As odd as it sounds, I really like making memes from my own pictures. (You can see examples in my Instagram account.) I usually use desktop programs like Photoscape or GIMP to create them, but it’s quite troublesome since the idea for a meme usually pops up when I’m in the middle of something where I can’t just grab my laptop and edit pictures. For that reason, I need a handy app for it. This early morning, when I woke up and couldn’t go back to sleep, I found a way to create memes using an app in my Xperia Miro. It’s a simple photo editor app with the option to add text using user installed fonts. I don’t know if there’s actually a simple app to generate memes from your own picture, but for me this app is quite easy to use. Read along to find out how to use it 🙂
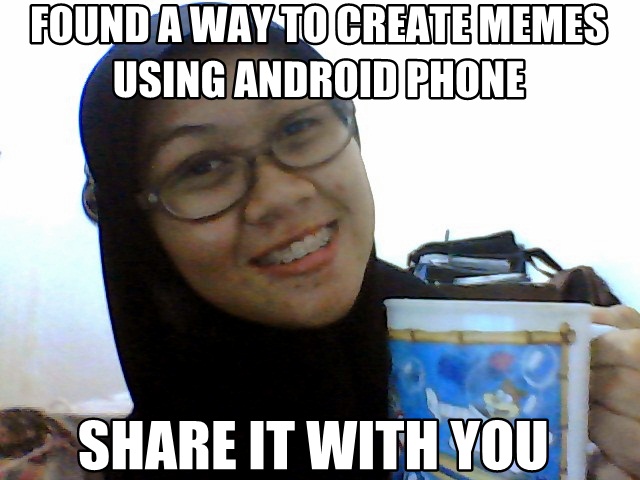 |
| Dexterous Dame Dara |
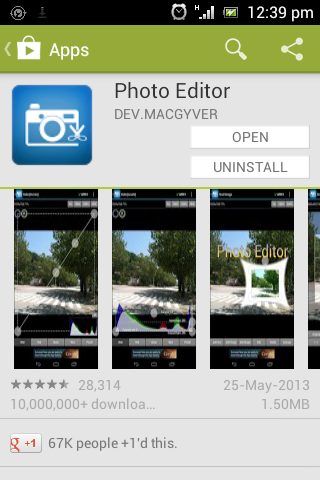
1. Install the Photo Editor app from Play Store.
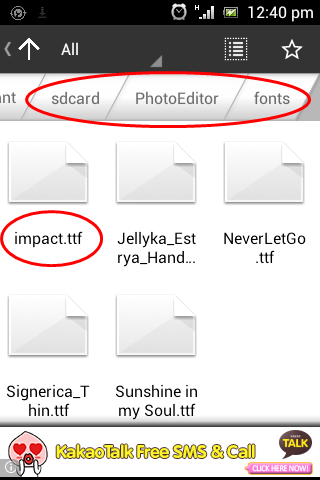
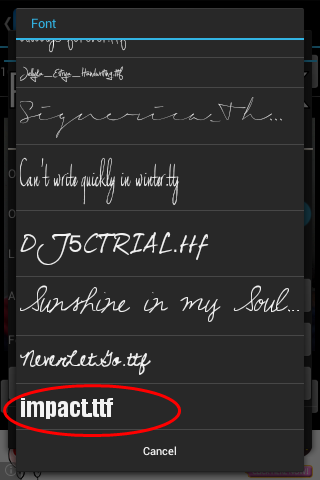
2. Internet memes usually use the Impact font. It can be easily found in any Windows computer. Copy the .ttf file to “mnt/sdcard/PhotoEditor/fonts”. (The location may be different in your device. Just locate where the app created its folder and then copy the .ttf file to the “fonts” subfolder.)
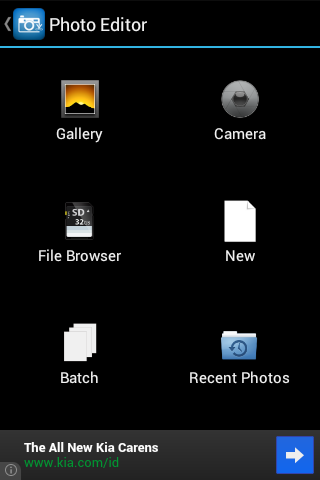
3. Open the app and then open the image that you want to use for your meme. You can use the one available in your gallery, or take a new one.
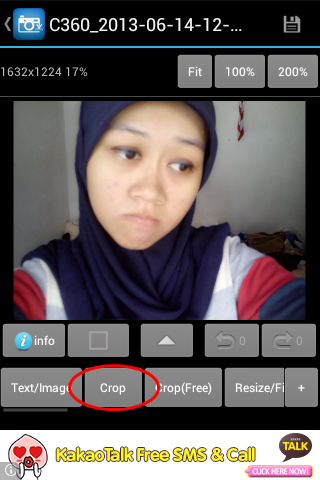
4. Internet memes usually have 4:3 ratio, so you might want to crop your picture in the same ratio. Tap on the “Crop” menu and choose “4:3”. You can zoom in by pinching the picture. If you have finished cropping, tap on the check icon on the top right corner.

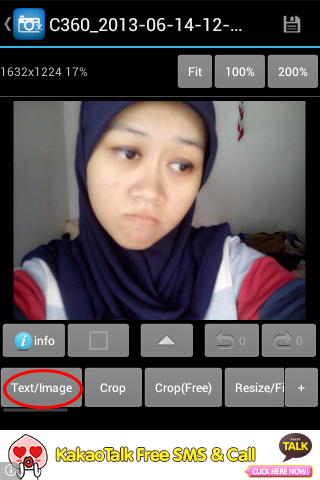
5. To add text to your picture, tap on the “Text/Image” menu.
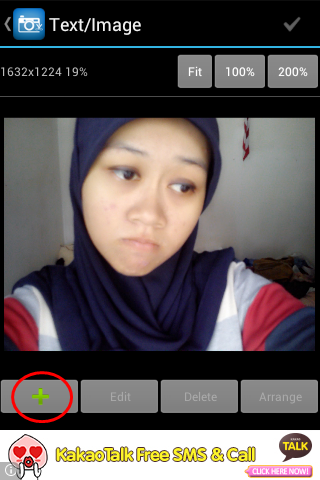
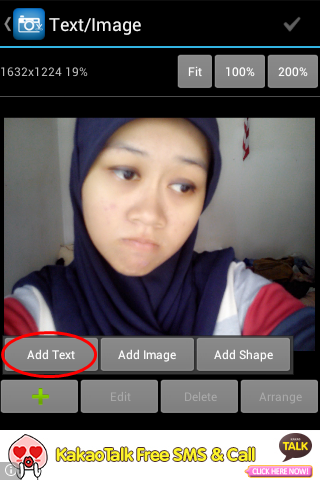
6. Tap on the “+” menu and choose “Add text”.
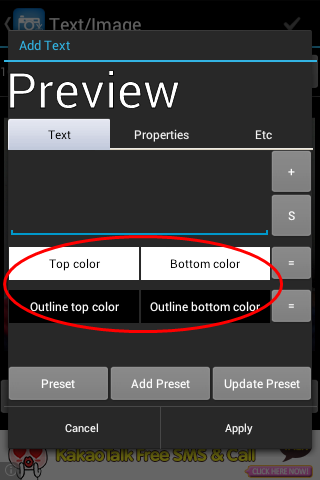
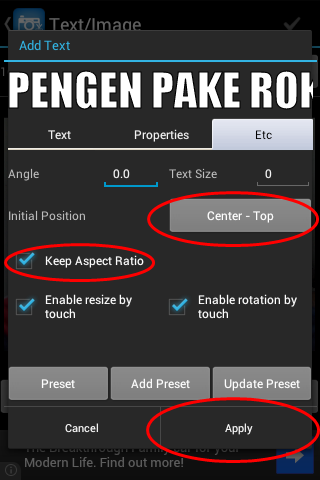
7. When a window (?) pop up, make sure the “Top color” and the “Bottom color” are white (or #FFFFFFFF) and the “Outline top color” and “Outline bottom color” are black (or #FF000000). You can change them by tapping on the boxes.
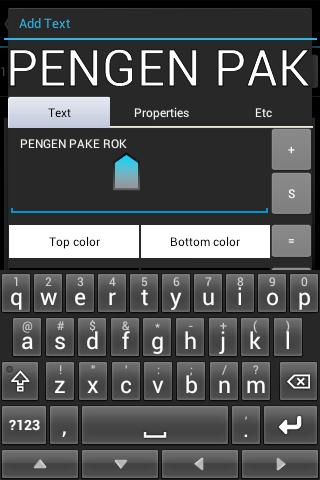
8. Write the caption for your meme in ALL CAPS.
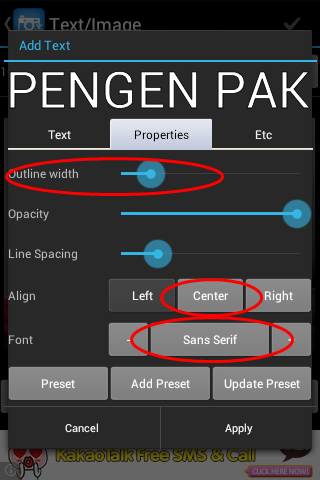
9. Go to the “Properties” tab. Change the “Outline width” to 25% or more and the “Align” to Center. Don’t forget to also change the font to Impact.
10. Go to the “Etc” tab and then change the “Initial Potition” to Center – Top (or Center – Bottom for the bottom caption). Thick on the “Keep Aspect Ratio” and then tap on “Apply”.
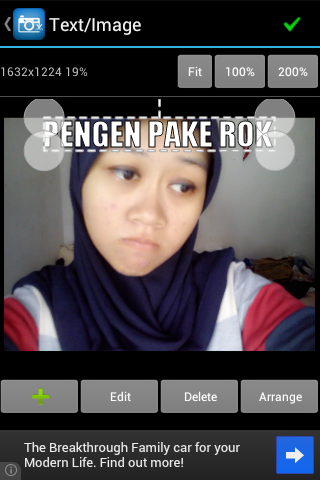
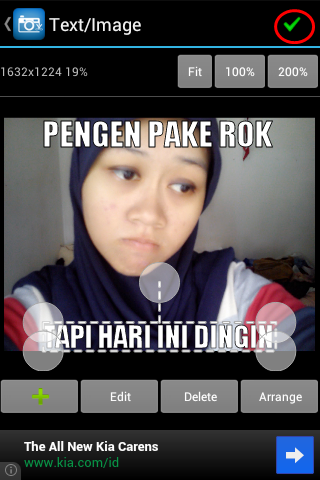
11. You’ve just created the top caption. Now you can repeat steps 6 through 10 to create the bottom caption. You can rearrange the position of the captions by dragging them around. If you’ve finished, tap on the green check symbol on the top right corner.
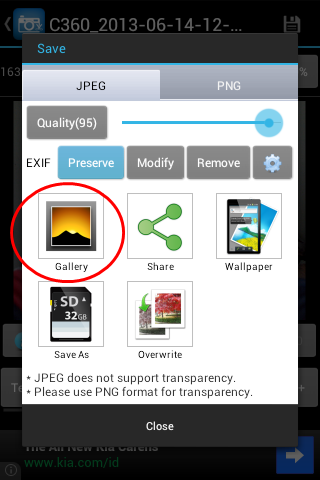
12. Tap on the save button and then select “Gallery” to save it on your gallery.
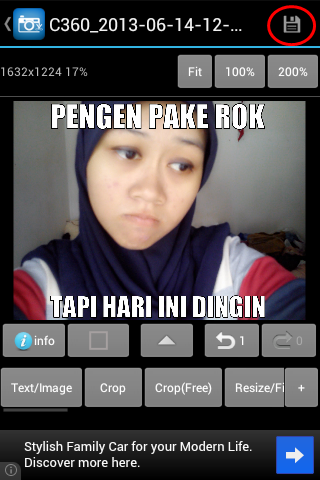
13. Wait for a second and it’s done 🙂
 |
| Second World Hijabis Problem |
Have fun making your face (or your friends’) a meme! 😉
Leave a Reply